 Hello,
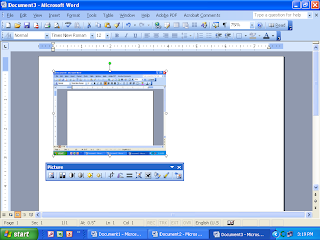
I hope you had a great week. Today I am sharing with you how to take screenshot pictures using MS Office 2003. Remember, all you have to do is push the print screen button on your keyboard. Whey you do this it will take a digital image or picture of your screen, like you see on the top. After you click it, you will not see any message that tells you that you have taken a picture and it is now ready to post. In fact you won’t notice anything different about your screen. When you click on the right side of the mouse chose the option paste and it will copy your picture in your office Document or PowerPoint. To edit the picture you have to double click fast on the left side of the mouse and you will see the Format Picture Box. If this does not work you will need to go to the very top of the screen and and chose the third option View. Then go down to the Toolbars option and check the option: picture and you will see a Picture tool bar appear on your screen like this  Once you see the Picture option box, choose the little dog. It is the 4th Picture from the right side of the toolbox and choose the option Tight.
If you want to edit or crop the picture chose this icon  Once you click on the little crop icon, you will see black lines around your picture. All you have to do is left click on the lines while holding the mouse and move the mouse to where you want to crop or cut the picture.
  Now if you double clicked on the picture you will see the following six tab options Color and Lines, Size, Layout, Picture, Text Box, and Web. You want to chose the third tab or the Layout option. When you chose this option you will see the following
  Next, you will click on the Tight option. It is located in the middle of the screen. Now you must decide if you want the picture aligned left, center, right or other. I would chose other and the when you click on the picture it will allow you to move it anywhere you want in your document. Once you chose the option you want click on the OK button on the bottom. You will see little white round dots around your picture (To see these white dots look very closely at the picture at the very top), which means you can now hold down the left side of the mouse to move it anywhere you want in your picture. You can also make the picture small or large by clicking on one of the dots and moving the mouse. Hope these directions help you out when you are practicing taking screen shot pictures and inserting them in your Documents or Power Points. We will see you next week.
